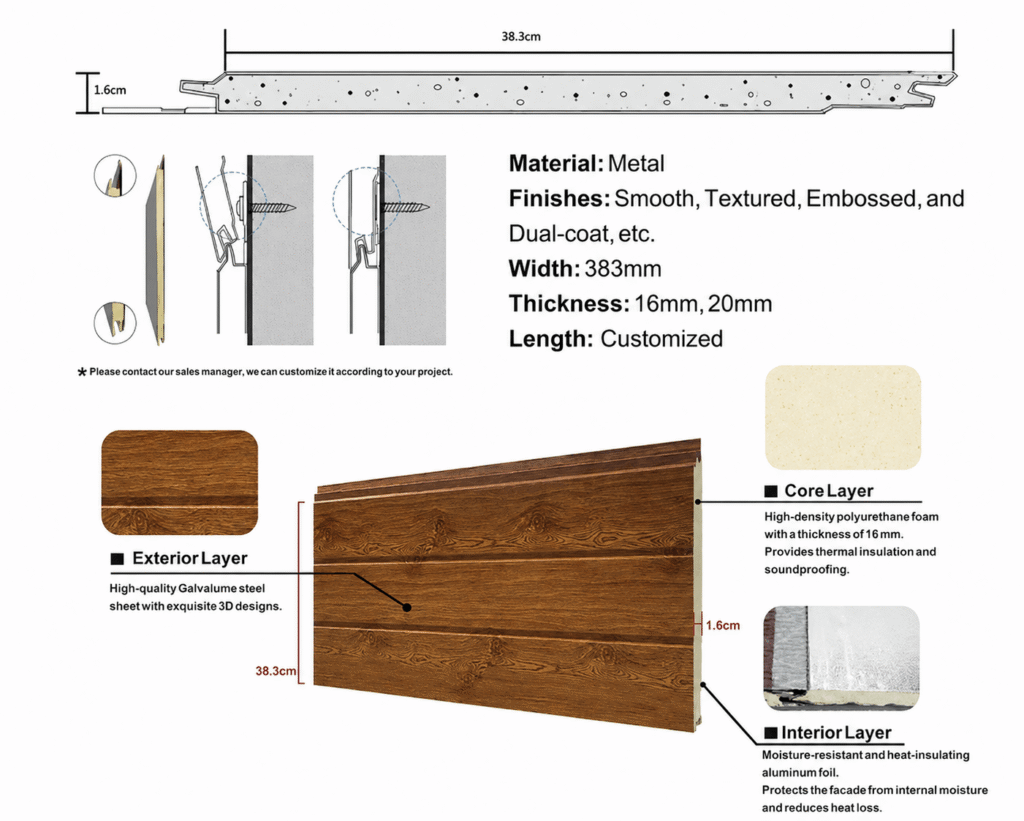
Our insulated panels are engineered with a tongue-and-groove locking system for fast and efficient installation.
Attach battens, noggins or metal furring strips for support, ensuring they are level and evenly spaced (450mm or 600mm spacing is recommended)
Attach the starter/side channel if necessary.
Use appropriate tools (e.g., angle grinder or a circular saw with a metal blade) to cut panels as required.
Fix the first panel using screws or nails. The screws should go through the tongue of the panel (it is recommended to fix a screw every 600mm).
Then align the groove of the second panel with the tongue of the first panel.
Ensure proper interlocking of both panels (tongue-and-groove system).
Continue fixing panels securely while checking alignment.
Seal joints and edges if required.
Cover exposed edges with trims or angles for a finished look.
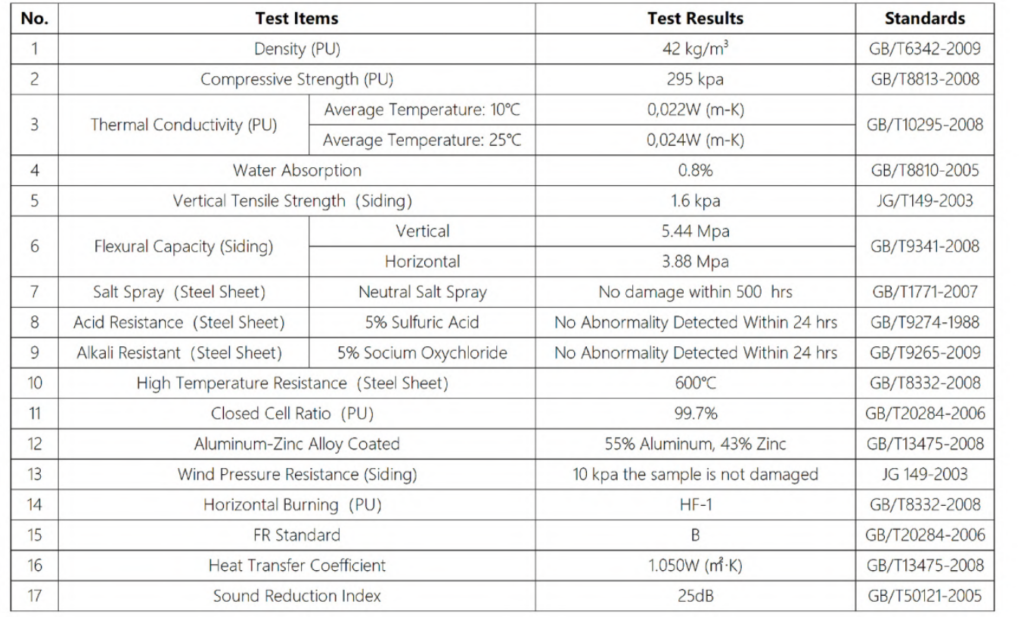
Ensure the core insulation is not exposed to water for durability.
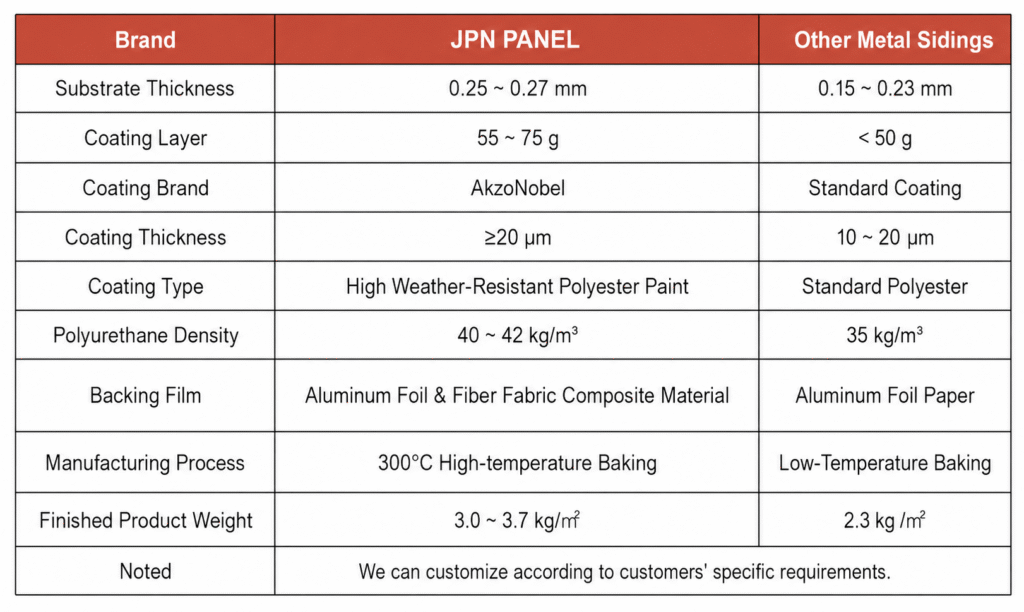
JPN CLAD supplies premium insulated wall and ceiling panels designed for residential, commercial, and industrial projects across Australia.